Best management practices: Hatchery sanitation critical control points
By MWI Animal Health
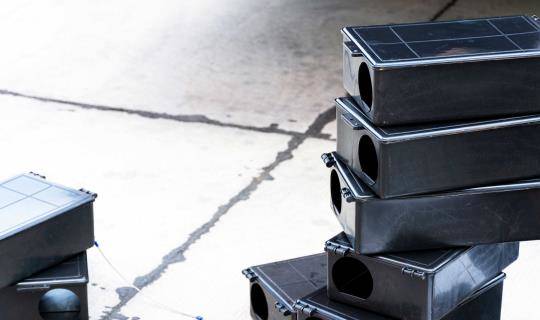
Egg trucks
1. Restrict egg delivery personnel to the egg receiving area; do not allow them to walk or take items into other sections of the hatchery and have them use a foot disinfecting pan/sponge mat/spray outside of the egg room back door. Disposable boots may be worn as an alternative and tires should be disinfected between farms.
2. Designate a person from within the hatchery to move buggies into the egg room.
3. To reduce chances of spreading disease-causing organisms from one farm to the next, the delivery vehicle must be properly cleaned and disinfected between each route twice a week. Biosecurity must be elevated when highly contagious viral diseases are in the region.
a. Rinse floor in truck bay before pulling trailer into wash area. Park truck on incline to facilitate draining of debris and soapy water out of the back of the egg truck.
b. Remove floor mats and other debris/trash from truck cab, and take any removable items off the outside of the truck and trailer.
c. Rinse all visible soils and organic matter from external surfaces of unit, paying close attention to wheels and undercarriage.
d. Cleaning:
i. Using a high pressure (Suttner quick connect) or handheld hose (Hydro) foamer, apply an alkaline-based foaming soap diluted at 2-3 oz/gal to wheels, undercarriage, floor mats, tractor/trailer exterior surfaces top to bottom,and then from inside out. Let foam solution remain for 15 minutes before rinsing. Manual scrubbing of any bulk stuck-on debris must be done prior to rinsing.
ii. Follow same procedures for all removed equipment.
iii. Manually re-scrub any areas that resist breaking up with foaming.
iv. Rinse using high-pressure spray with a fan tip and let the truck air dry/drip dry on incline.
e. Disinfecting:
i. Spray or foam a disinfectant with effective residual on floor mats and inside of cab. Ensure material compatibility of the disinfectant on these surfaces.
ii. Rinse wash area floor in truck bay, removing all organic matter down the drain or into culvert; this is to prevent recontamination from occurring.
iii. Spray or foam a disinfectant to all removable equipment and let dry.
iv. Apply disinfectant starting on the outside of the trailer, then inside at top of trailer down, working from front to back.
v. Verify disinfectant concentration using an appropriate strip on wet/foamed disinfected truck surfaces and floor mats once per month.
4. Replace all equipment and floor mats into truck.
5. Steering wheels, door handles, dashboard knobs and buttons, and seats should be wiped with a disposable disinfecting wipe.
Egg receiving area and egg room (every hatch day)
1. Remove equipment and eggs when possible. Inventory fluctuations may make it necessary to move eggs from one area of the Egg Room while cleaning another portion of the room, and moving eggs back again.
2. Remove broken eggs and debris as they are found and repeat for empty floor areas. Use a flat shovel and or broom.
3. Egg holding rooms (walls, floors, equipment, empty buggies) should be completely cleaned with an alkaline hatchery foaming soap, focusing on walls and the floor only. Manually scrub walls and floor areas with broken eggs of debris that will not loosen. Ceilings should be foamed and rinsed once or twice per year.
4. Pressure rinse the soap after 15 minutes of contact time, being careful not to wet any eggs in farm racks.
5. Squeegee any standing water from the floor.
6. Using a mechanical fogger, fog the egg room(s) with disinfectant labeled for hatching eggs (peracetic acid, hydrogen peroxide) solution twice daily, once in the AM and once after receiving the last egg delivery, in order to reduce potential pathogens tracked in from the farm. Fog the disinfecting solution using a central fogging system, 2–3 portable foggers, or 2–3 dedicated drum foggers. Be careful not to splash or wet eggs or allow condensation to drip on eggs!
Ventilation systems
1. Egg room ventilation systems should be cleaned as needed and filters replaced at least once monthly to avoid contamination with Aspergillus fumigatus, the main mold species impacting chick health.
2. Setter room ventilation systems should be cleaned and filters replaced after each set is removed.3. Hatcher, processing, and chick room ventilation systems should be cleaned at least once weekly and filters changed or cleaned after each hatch/twice per week. 4. Evaporative coolers should be completely cleaned at Spring start-up and at least once weekly throughout the warmer months and treated with non-foaming disinfectant with algaecide and fungicide label.
Setters and setter halls
(all setters should be off and locked out/tagged out for sanitation)
1. Scrape up and remove buildup from floors during each clean out using a broom or wet/dry vacuum. Note: If there is long‑term buildup, it may be necessary to carefully apply a solution of high foaming alkaline cleaner to small sections of the floor. Allow 5–10 minutes for the solution to soften adherent soils and hand scrub and rinse. Be careful not to wet eggs!
2. Clean multi-stage setters twice weekly, prior to set, and after transfer. Remove all transfer cracks and exploders with a shovel, making sure to clean and disinfect shovels in hatch hall at the end of the cleaning. Note: Attach plastic curtain behind fan board in Chick Master® to avoid wetting eggs when lowered! Always protect controllers and equipment from wetting.
3. For single-stage setters after transfer, clean fans, fan boards, humidity drip pans, and all accessible wall areas with high foaming alkaline cleaner.
4. Use a clean scouring pad and fresh bucket of soap solution high-foaming alkaline cleaner to clean each machine. Shop cloths or sponges work well on fan boards and blades.
5. After sufficient drying, apply a disinfectant solution as a course spray or foam to all accessible areas in the setter, wetting the floors last.
6. Using a clean squeegee, remove excess disinfectant solution. Note: This step is extremely important in order to prevent humidity levels from rising in the setter. Do not rinse disinfectant from setters!
7. Use high-foaming acidic cleaner to clean mineral scale and alkaline detergent residues from fan blades when necessary.
8. In hatcheries where the water has a high mineral content, a sequestering agent like EDTA may be recommended to help scaling and prevent buildup (e.g., mineral scale buildup).
9. Finish cleaning all machines (if possible) and then clean the room. Squeegee any puddles, and wash all chick/egg debris down into the drain.
10. Apply high-foaming alkaline cleaner to outside of setters and floors, being careful not to push foam under the doors into setters. Rinse down foamed surfaces after 10-15 minutes, being careful not to work ahead too far. Do not allow wash water to flow back into setters, causing unwanted recontamination and moisture.
11. After wash-and-rinse, foam a solution of disinfectant to walls/doors, and finish with floors. Start at the bottom and work your way to the top. Verify the disinfectant concentration on wetted disinfected surfaces using quat test strips once per week.
12. Check to make sure that no excess liquids have entered the setters. Remove all excess liquids from the setter room, setters, and hatchers with a squeegee. Remember: Excess humidity and wet areas in machines that incubate chicks promote bacterial and fungal growth.
13. Periodic fogging of setters and setter rooms with a disinfectant solution may be necessary to control and prevent growth of certain microorganisms. Fog these areas only as necessary for better control over incoming pathogens that may be horizontally spread in the hatchery.
14. Use 5–25 ppm hydrogen peroxide in the humidity lines in the set halls to reduce pathogen loads associated with the humidification process.
Hatchers and hatcher halls (all setters should be off, locked out/tagged out for sanitation)
1. After all chicks have been, or are being removed, be sure hatcher room doors and the doors on each empty hatcher are kept closed. If possible, pull chicks from the far end of the hall first to avoid pulling in front of hatchers being cleaned and disinfected. Place any loose chicks in hatch trays and remove power (lock out).
2. Remove detachable equipment (fans) from machines (use Chick Master or Jamesway specific instructions). Remove formaldehyde trays/wicks, etc.
3. As pull proceeds in the hall, remove waste matter, preferably by vacuuming or wet sweeping/shoveling. Wet sweeping after lightly misting fluff/down, shell, and other debris can minimize dispersion of dust, thereby reducing the chances of spreading contamination to other areas of the hatchery. Vacuuming wetted debris will minimize dust and fluff in the air. Keep all doors closed throughout the hatchery during chick pull!
4. Apply a high foaming alkaline cleaner beginning at the bottom of back wall of the hatcher facing out to foam back of lines/diffusers, then turning in facing the back of the hatcher, foam all surfaces from bottom to top. Repeat the same procedure on doors, and finish by foaming the ceiling and floors, back to front. Repeat on all machines, not working too far ahead to allow the foam to dry beyond 20 minutes but not less than 10 minutes.
5. Perform manual soap scrubbing with an abrasive pad, focusing on inside the hatchers. This is one of the most critical steps in controlling both scale and bacteria.
6. Plenums should be cleaned in conjunction with the hatchers and hatch room; all cleaning to be done prior to disinfecting.
7. Note: Care should be taken to not push debris or water into cleaned hatchers while cleaning plenums.
8. After completing the foaming and scrubbing steps (10–20 minutes), each surface should be rinsed with high pressure water.
9. Rinse down hatchers and equipment with high pressure (front-to-back, top-to-bottom). Use pressure rinse to remove additional loose debris, focusing on the water knocking out/off all fluff from chicks that can be found by inspection. Starting at the far end, wash all hatcher interiors, then exteriors and hall to the center drain.
10. Squeegee excess water from hatchers and hatcher room in the same order.
11. Allow as much time as possible for hatchers to dry before application of disinfectant.
12. Apply disinfectant to all surfaces as a foam in the hatchers, plenums, and hatcher room. No more movement of air or fluff can be done after disinfection has started. Verify disinfectant concentration on wet hatchers or plenums using test strips once per week. Be careful not to add excess water to plenums during sanitation.
13. Move cleaned and disinfected hatcher buggies and trays into hatchers and preheat units in preparation for transfer, closing the doors completely/almost completely to facilitate drying.
14. After transfer is complete, fog hatchers and hatcher rooms with disinfectant solution.
15. For hatcheries without a CFS, fogging of hatchers and hatcher rooms is recommended once daily using multiple foggers. Customize for your hatchery…drum foggers, central fogging, or Fog-Its.
16. Close attention must be paid to cleaning overhead pipes, air ducts, and machine tops as they are potential sources of recontamination. Vacuum first then mop a cleaning solution of high foaming alkaline soap, followed by a rinse mop, making sure to wash prior to disinfecting any surfaces. This should be done once per quarter or as needed.
Room fogging
Routine fogging of disinfectant is important to reduce pathogens in the air and on surfaces within the room. All rooms should be fogged after transfer and again nightly through a high-pressure system capable of completely saturating the air within the room. Personnel are not permitted in the rooms during application of fog and should not re-enter until proper time has elapsed (see label for re-entry times). Fogging may be increased to 4x per day as needed.
Chick processing and holding area
Tray wash (and box washers and buggy/rack washers)*
1. Equipment flow should be designed so that after cleaning and disinfection through appropriate washers (tray washer, buggy washer, chick box washer, etc.), traffic or overspray/splash does not allow recontamination.
2. For routine use, an alkaline low-foaming tray wash soap is used in these washers at a rate of ¼- to ½-ounce per gallon during the cleaning process, with additional soap introduced periodically during processing through the use of an automated tray wash pump on a timer or with a probe. The drum of soap must be located at the automatic washer — do not carry diluted soap from chemical room to washers. Important: Always place the full, undiluted drum of soap at the washer location!
3. At the end of the tray wash, a dip tank or spray bar system will deliver disinfectant on trays. Important: Do not use a fan to dry trays after disinfecting, prior to stacking!
a. For dip tanks, the disinfectant can be added automatically using a medicator pump to constantly deliver sufficient diluted disinfectant and fresh water into the tank from the drum located at the tray/buggy/box washer. Important: Do not carry diluted disinfectant from the chemical room to the washers — place a full drum of disinfectant at each washer location!
b. For spray bars, the disinfectant can be added automatically using a medicator pump to the spray bar to deliver disinfectant onto the wet trays from the disinfectant concentrate drum located at the tray/buggy/box washer. Always place the full undiluted drum of disinfectant at the washer location!
c. Disinfectant concentration can be measured on wet trays/boxes/buggies once per day using test strips. Once a system has been in place, checking proper levels may be backed off to once per week.
Chick processing and holding area
1. This area should be cleaned and disinfected after each processing day. Remove all debris from the floors with a shovel and broom.
2. Foam room walls and floor with high foaming alkaline soap diluted — in the chemical room — into the portable foamer. Begin at the highest wall area and work down. Do not wet electrical boxes, fans, alarms, etc.
3. Hand scrub or mop stubborn areas on walls and floors as necessary.
4. Rinse with high pressure and squeegee any standing water from the floor.
5. Foam disinfectant onto walls and doors, then finish with floors. Verify disinfectant concentration on wetted disinfected surfaces using test strips once per month.
* As necessary (depending on hardness of water and scale build up), use low foaming acid cleaner to clean and dissolve hard water and chemical residues from tray and box washer coils and nozzles.
Hatchery main entrance and other employee entrance(s)
All visitors to the hatchery should be required to sign in at the front desk and wear shoe covers and/or step in disinfectant solution or powder, or apply an aerosol spray disinfectant on shoes prior to entry. This biosecurity tool should be present at all entry points in the hatchery, including delivery and receiving.Chick bus/delivery vehicle
1. Chick delivery personnel should wear boots that can be disinfected or disposable boots between farms. Vehicle tires should also be disinfected.
2. Chick delivery personnel should be restricted to the chick load out area and not allowed to walk or take items into other sections of the hatchery. They should also use a foot disinfecting pan/sponge mat/spray outside of the chick room door.
3. A Smithway should be cleaned and disinfected in the following manner:
Interior of trailer (after each delivery day):
a. Park the truck on an incline to facilitate draining.
b. Protect any controls and sensitive equipment.
c. Remove filters and wash/disinfect per manufacturer’s recommendations.
d. Quickly pressure rinse all visible soils from the inside of the trailer.
e. Foam the inside of the unit with high foaming alkaline soap and let stand for 15 minutes. Begin at the front of the trailer and work to the rear, pushing debris out with drain water.
f. Manually scrub any necessary areas to remove stubborn dried material.
g. Rinse again with high pressure from front to rear and let dry.
h. Apply disinfectant via foam or course foam/mist with a HydroFoamer.
Exterior of trailer and cab (at least weekly):
a. Rinse all visible soils and organic matter from external surfaces of unit, paying close attention to wheels and undercarriage.
b. Apply high foaming alkaline soap to the exterior of the vehicle and floor mats.
c. Manually scrub any areas of the vehicle necessary.
d. After 15 minutes of contact time, rinse with a high-pressure spray and let dry.
e. Apply disinfectant from the top of the trailer down using a HydroFoamer.
f. All items such as floor mats should be removed from the cab of the truck and cleaned and disinfected.
g. The interior of the cab should be maintained free of debris and cleaned daily. Disinfection of the interior of the cab can be performed via a fine mist of disinfectant and with Lysol or Clorox disinfecting wipes for steering wheels, knobs and buttons, seats, etc.